Gowhich

Durban's Blog

关于这个的使用是源于我参看的一个图表表格的使用

操作步骤是这样的

第一步,自己写个页面,用来实现页面的某些效果的,比如这里的温度曲线图,是调用的highchart的js插件。外加一些css效果。

第二步,在自己的app中将要使用的页面加载进来,这里调用的是index.html

第三步,使用webview进行呈现,还要灵活的使用webview的一个方法【stringByEvaluatingJavaScriptFromString】

这里只演示一下如何使用,具体的页面部分,可以自己写,我放在自己的github上。

TemperatureCurveViewController.h

1
2
3
4
5
6
7
8
9
10
11
12
13
14
15
16
//
// TemperatureCurveViewController.h
// Real-time temperature curve
//
// Created by david on 13-8-15.
// Copyright (c) 2013年 WalkerFree. All rights reserved.
//

#import <UIKit/UIKit.h>

@interface TemperatureCurveViewController : UIViewController<UIWebViewDelegate, UITextFieldDelegate>

@property(retain, nonatomic) UIWebView *webViewForSelectDate;
@property(retain, nonatomic) NSTimer *timer;

@end

TemperatureCurveViewController.m

1
2
3
4
5
6
7
8
9
10
11
12
13
14
15
16
17
18
19
20
21
22
23
24
25
26
27
28
29
30
31
32
33
34
35
36
37
38
39
40
41
42
43
44
45
46
47
48
49
50
51
52
53
54
55
56
57
58
59
60
61
62
63
64
65
66
67
68
69
70
71
72
73
74
75
76
77
78
79
80
81
82
83
84
85
86
87
88
89
90
91
92
93
94
95
96
97
98
99
100
101
102
103
//
// TemperatureCurveViewController.m
// Real-time temperature curve
//
// Created by david on 13-8-15.
// Copyright (c) 2013年 WalkerFree. All rights reserved.
//

#import "TemperatureCurveViewController.h"

@interface TemperatureCurveViewController ()

@end

@implementation TemperatureCurveViewController

@synthesize webViewForSelectDate;
@synthesize timer;

- (void)viewDidLoad
{
[super viewDidLoad];

// UIInterfaceOrientation orientation = [UIDevice currentDevice].orientation;
// if(UIDeviceOrientationIsPortrait(orientation) || orientation == UIDeviceOrientationUnknown){
// if([[UIDevice currentDevice] respondsToSelector:@selector(setOrientation:)]){
// [[UIDevice currentDevice] performSelector:@selector(setOrientation:)
// withObject:(id)UIDeviceOrientationLandscapeRight];
// }
//
// }

CGRect webFrame = self.view.frame;
webFrame.origin.x = 0;
webFrame.origin.y = 0;

webViewForSelectDate = [[UIWebView alloc] initWithFrame:webFrame];
webViewForSelectDate.delegate = self;
webViewForSelectDate.scalesPageToFit = YES;
webViewForSelectDate.opaque = NO;
webViewForSelectDate.backgroundColor = [UIColor clearColor];
webViewForSelectDate.autoresizingMask = (UIViewAutoresizingFlexibleHeight | UIViewAutoresizingFlexibleWidth);
[self.view addSubview:webViewForSelectDate];

NSString *htmlPath = [[[NSBundle mainBundle] resourcePath] stringByAppendingPathComponent:@"curve.bundle/index.html"];

NSURL *url = [NSURL fileURLWithPath:htmlPath];
NSURLRequest *request = [NSURLRequest requestWithURL:url];

[webViewForSelectDate loadRequest:request];


}

- (void)didReceiveMemoryWarning
{
[super didReceiveMemoryWarning];
// Dispose of any resources that can be recreated.
}

-(BOOL) shouldAutorotate{
return YES;
}

-(NSUInteger)supportedInterfaceOrientations{
return UIInterfaceOrientationMaskAll;
}

-(void) updateData{
NSDate *nowDate = [[NSDate alloc] init];
NSTimeInterval nowTimeInterval = [nowDate timeIntervalSince1970] * 1000;

int temperature = [self getRandomNumber:20 to:50];

NSMutableString *jsStr = [[NSMutableString alloc] initWithCapacity:0];
[jsStr appendFormat:@"updateData(%f,%d)",nowTimeInterval, temperature];

[webViewForSelectDate stringByEvaluatingJavaScriptFromString:jsStr];
}

-(int) getRandomNumber:(int)from to:(int)to{
return (int)(from + (arc4random() % (to - from + 1)));
}

#pragma mark - delegate o webview
-(BOOL) webView:(UIWebView *)webView shouldStartLoadWithRequest:(NSURLRequest *)request navigationType:(UIWebViewNavigationType)navigationType{
return YES;
}

-(void) webView:(UIWebView *)webView didFailLoadWithError:(NSError *)error{

}

-(void) webViewDidFinishLoad:(UIWebView *)webView{
timer = [NSTimer scheduledTimerWithTimeInterval:1
target:self
selector:@selector(updateData)
userInfo:nil
repeats:YES];
}

@end

其主要的一点就是使用stringByEvaluatingJavaScriptFromString这个方法,他可以灵活的将js嵌入页面中,进行操作,而且一定是要在webview加载完后进行调用。

之前自己也使用过,但是感觉很是别扭,还要调试什么尺寸的这个问题,今天看了cookbook的方法,明白了,该如何使用,来个例子好了。

UIPickerViewDemoViewController.h

1
2
3
4
5
6
7
8
9
10
11
12
13
14
15
16
//
// UIPickerViewDemoViewController.h
// UIPickerViewDemo
//
// Created by david on 13-8-14.
// Copyright (c) 2013年 WalkerFree. All rights reserved.
//

#import <UIKit/UIKit.h>

#define COOKBOOK_PURPLE_COLOR [UIColor colorWithRed:0.20392f green:0.19607f blue:0.61176f alpha:1.0f]
#define BARBUTTON(TITLE, SELECTOR) [[UIBarButtonItem alloc] initWithTitle:TITLE style:UIBarButtonItemStylePlain target:self action:SELECTOR]

@interface UIPickerViewDemoViewController : UIViewController<UIPickerViewDataSource,UIPickerViewDelegate,UIActionSheetDelegate>

@end

UIPickerViewDemoViewController.m

1
2
3
4
5
6
7
8
9
10
11
12
13
14
15
16
17
18
19
20
21
22
23
24
25
26
27
28
29
30
31
32
33
34
35
36
37
38
39
40
41
42
43
44
45
46
47
48
49
50
51
52
53
54
55
56
57
58
59
60
61
62
63
64
65
66
67
68
69
70
71
72
73
74
//
// UIPickerViewDemoViewController.m
// UIPickerViewDemo
//
// Created by david on 13-8-14.
// Copyright (c) 2013年 WalkerFree. All rights reserved.
//

#import "UIPickerViewDemoViewController.h"

@interface UIPickerViewDemoViewController ()

@end

@implementation UIPickerViewDemoViewController

- (void)viewDidLoad
{
[super viewDidLoad];


self.navigationController.navigationBar.tintColor = COOKBOOK_PURPLE_COLOR;
self.navigationItem.rightBarButtonItem = BARBUTTON(@"操作", @selector(action:));
}

- (void)didReceiveMemoryWarning
{
[super didReceiveMemoryWarning];
// Dispose of any resources that can be recreated.
}

-(BOOL) shouldAutorotateToInterfaceOrientation:(UIInterfaceOrientation)toInterfaceOrientation{
return YES;
}

#pragma mark - UIPickerView Method
-(NSInteger) numberOfComponentsInPickerView:(UIPickerView *)pickerView{
return 3;
}

-(NSInteger) pickerView:(UIPickerView *)pickerView numberOfRowsInComponent:(NSInteger)component{
return 20;
}

-(NSString *) pickerView:(UIPickerView *)pickerView titleForRow:(NSInteger)row forComponent:(NSInteger)component{
return [NSString stringWithFormat:@"%@-%d", (component == 1 ? @"R" : @"L"), row];
}

-(void) actionSheet:(UIActionSheet *)actionSheet clickedButtonAtIndex:(NSInteger)buttonIndex{
UIPickerView *pickerView = (UIPickerView *)[actionSheet viewWithTag:101];
self.title = [NSString stringWithFormat:@"L%d-R%d-L%d",[pickerView selectedRowInComponent:0], [pickerView selectedRowInComponent:1], [pickerView selectedRowInComponent:2]];

}

-(void) action:(id)sender{
NSString *title = UIDeviceOrientationIsLandscape([UIDevice currentDevice].orientation) ? @"\n\n\n\n\n\n\n\n\n" : @"\n\n\n\n\n\n\n\n\n\n\n\n";
UIActionSheet *actionsheet = [[UIActionSheet alloc] initWithTitle:title
delegate:self
cancelButtonTitle:nil
destructiveButtonTitle:nil
otherButtonTitles:@"选择此项", nil];
[actionsheet showInView:self.view];

UIPickerView *pickerView = [[UIPickerView alloc] init];
pickerView.tag = 101;
pickerView.delegate = self;
pickerView.dataSource = self;
pickerView.showsSelectionIndicator = YES;

[actionsheet addSubview:pickerView];

CFShow((__bridge CFTypeRef)(NSStringFromCGRect(pickerView.frame)));
}
@end

在自己的项目中,没有任何强制要求的前提下,完全是可以做出很华丽的应用的,要掌握正确的使用方式。

这里面其实重点是要使用代理方法UIPickerViewDataSource,UIPickerViewDelegate,UIActionSheetDelegate这个三个在这里是不能少的。

XDebug是什么

XDebug是一个开放源代码的PHP程序调试器(即一个Debug工具),可以用来跟踪,调试和分析PHP程序的运行状况。
安装XDebug

访问 www.xdebug.org ,根据版本号与自己的操作系统、PHP版本下载合适的。
编辑php.ini,有些集合环境已自带xdebug的配置,如果没有则自己手动加入下面几行:

1
2
3
4
5
6
7
8
9
[xdebug]
zend_extension=/usr/lib/php5/20090626+lfs/xdebug.so
xdebug.auto_trace = on
xdebug.auto_profile = on
xdebug.collect_params = on
xdebug.collect_return = on
xdebug.profiler_enable = on
xdebug.trace_output_dir = "/var/log/trace_xdebug_log"
xdebug.profiler_output_dir = "/var/log/profiler_xdebug_log"

XDebug参数简介:

zend_extension 加载xdebug扩展
xdebug.auto_trace 自动打开打开函数调用监测
xdebug.auto_profile 自动打开性能监测
xdebug.trace_output_dir 设定函数调用监测信息的输出文件的路径。
xdebug.profiler_output_dir 设定效能监测信息输出文件的路径。
xdebug.collect_params 打开收集“函数参数”的功能。将函数调用的参数值列入函数过程调用的监测信息中。
xdebug.collect_return 打开收集“函数返回值”的功能。将函数的返回值列入函数过程调用的监测信息中。
重启Nginx,php-fpm。
写一个test.php,内容为,如果输出的内容中有看到xdebug,说明安装配置成功。或者去/home/ad/xdebug_log下看看是不是日志已经出来了。

关于xdebug.trace_format=1,如果你使用触发方式启用代码追踪:(xdebug.auto_trace = 0;xdebug.trace_enable_trigger = 1),那么,你可以在URL里添加XDEBUG_TRACE,例如:localhost/test.php?XDEBUG_TRACE,或者localhost//test.php?XDEBUG_TRACE=1(任意值)。

是不是觉得很麻烦,那么装个插件,让它来帮你。Chrome XDEBUG Helper,使用它,你可以切换3种状态,disabled ,debugging enabled,profiling enabled(下篇详细介绍),然后切换到debugging enabled。运行该脚本,(去掉URL里的?XDEBUG_TRACE),就可以代码跟踪了。

使用xdebug_start_trace()和xdebug_stop_trace()可以手动追踪你的代码执行情况。

1
2
3
xdebug_start_trace();
//your code required to trace
xdebug_stop_trace();

设定 xdebug.auto_trace = 1 将在执行所有 PHP 脚本之前先启用自动跟踪。另外,您可以通过代码设定 xdebug.auto_trace = 0,并分别使用 xdebug_start_trace() 和 xdebug_stop_trace() 函数启用和禁用跟踪。但是,如果 xdebug.auto_trace 为 1,则可以在包括配置好的 auto_prepend_file 之前先启动跟踪。

选项 xdebug.trace_ouput_dir 和 xdebug.trace_output_name 用于控制保存跟踪输出的位置。在这里,所有文件都被保存到 /tmp/traces 中,并且每个跟踪文件都以 trace 为开头,后接 PHP 脚本的名称(%s)以及进程 ID(%p)。所有 Xdebug 跟踪文件都以 .xt 后缀结尾。

默认情况下,XDebug 将显示时间、内存使用量、函数名和函数调用深度字段。如果将 xdebug.trace_format 设为 0,则输出将符合人类阅读习惯(将参数设为 1 则为机器可读格式)。此外,如果指定 xdebug.show_mem_delta = 1,则可以查看内存使用量是在增加还是在减少,而如果指定 xdebug.collect_params = 4,则可以查看传入参数的类型和值。要监视每个函数返回的值,请设定 xdebug.collect_return = 1。

PS:
结果是测试失败,因为我是在虚拟机里面测试的,线路不通,端口的配置有点问题,做了这样的调整

1
2
3
4
5
xdebug.remote_enable=1
xdebug.remote_port=9000
xdebug.remote_host="192.168.0.103"
xdebug.remote_handler="dbgp"
xdebug.remote_mode="req"

结果还是一样,提示

1
2
3
4
5
6
7
8
9
10
11
12
Notice: Trace could not be started in /home/davidzhang/local.ubuntu.test.com/index.php on line 4

Call Stack:
0.0002 330764 1. {main}() /home/davidzhang/local.ubuntu.test.com/index.php:0
0.0002 330808 2. xdebug_start_trace() /home/davidzhang/local.ubuntu.test.com/index.php:4

asasdasd
Notice: Function trace was not started in /home/davidzhang/local.ubuntu.test.com/index.php on line 6

Call Stack:
0.0002 330764 1. {main}() /home/davidzhang/local.ubuntu.test.com/index.php:0
0.0003 330808 2. xdebug_stop_trace() /home/davidzhang/local.ubuntu.test.com/index.php:6

求大神帮助

PHP网页的安全性问题
针对PHP的网站主要存在下面几种攻击方式:
1.命令注入(Command Injection)
2.eval注入(Eval Injection)
3.客户端脚本攻击(Script Insertion)
4.跨网站脚本攻击(Cross Site Scripting, XSS)
5.SQL注入攻击(SQL injection)
6.跨网站请求伪造攻击(Cross Site Request Forgeries, CSRF)
7.Session 会话劫持(Session Hijacking)
8.Session 固定攻击(Session Fixation)
9.HTTP响应拆分攻击(HTTP Response Splitting)
10.文件上传漏洞(File Upload Attack)
11.目录穿越漏洞(Directory Traversal)
12.远程文件包含攻击(Remote Inclusion)
13.动态函数注入攻击(Dynamic Variable Evaluation)
14.URL攻击(URL attack)
15.表单提交欺骗攻击(Spoofed Form Submissions)
16.HTTP请求欺骗攻击(Spoofed HTTP Requests)

Snoopy是一个php类,用来模拟浏览器的功能,可以获取网页内容,发送表单。

Snoopy 正确运行需要你的服务器的 PHP 版本在 4 以上,并且支持 PCRE(Perl Compatible Regular Expressions),基本的 LAMP 服务都支持。
下 载snoopy

Snoopy的一些特点:

1,抓取网页的内容 fetch
2,抓取网页的文本内容 (去除HTML标签) fetchtext
3,抓取网页的链接,表单 fetchlinks fetchform
4,支持代理主机
5,支持基本的用户名/密码验证
6,支持设置 user_agent, referer(来路), cookies 和 header content(头文件)
7,支持浏览器重定向,并能控制重定向深度
8,能把网页中的链接扩展成高质量的url(默认)
9,提交数据并 且获取返回值
10,支持跟踪HTML框架
11,支持重定向的时候传递cookies
要求php4以上就可以了 由于本身是php一个类 无需扩支持 服务器不支持curl时候的最好选择,

类方法:

fetch($URI)
———–

这是为了抓取网页的内容而使用的方法。
$URI参数是被抓取网页的URL地址。
抓取的结果被存储在 $this->results 中。
如果你正在抓取的是一个框架,Snoopy将会将每个框架追踪后存入数组中,然后存入 $this->results。

fetchtext($URI)
—————

本方法类似于fetch(),唯一不同的就是本方法会去除HTML标签和其他的无关数据,只返回网页中的文字内容。

fetchform($URI)
—————

本方法类似于fetch(),唯一不同的就是本方法会去除HTML标签和其他的无关数据,只返回网页中表单内容(form)。

fetchlinks($URI)
—————-

本方法类似于fetch(),唯一不同的就是本方法会去除HTML标签和其他的无关数据,只返回网页中链接(link)。
默认情况下,相对链接将自 动补全,转换成完整的URL。

submit($URI,$formvars)
———————-

本方法向$URL 指定的链接地址发送确认表单。$formvars是一个存储表单参数的数组。

submittext($URI,$formvars)
————————–

本方法类似于submit(),唯一不同的就是本方法会去除HTML标签和其他的无关数据,只返回登陆后网页中的文字内容。

submitlinks($URI)
—————-

本方法类似于submit(),唯一不同的就是本方法会去除HTML标签和其他的无关数据,只返回网页中链接(link)。
默认情况下,相对链接将 自动补全,转换成完整的URL。

类属性: (缺省值在括号里)

$host 连接的主机
$port 连接的端口
$proxy_host 使用的代理主机,如果有的话
$proxy_port 使用的代理主机端口,如果有的话
$agent 用户代理伪装 (Snoopy v0.1)
$referer 来路信息,如果有的话
$cookies cookies, 如果有的话
$rawheaders 其他的头信息, 如果有的话
$maxredirs 最大重定向次数, 0=不允许 (5)
$offsiteok whether or not to allow redirects off-site. (true)
$expandlinks 是否将链接都补全为完整地址 (true)
$user 认证用户名, 如果有的话
$pass 认证用户名, 如果有的话
$accept http 接受类型 (image/gif, image/x-xbitmap, image/jpeg, image/pjpeg, */*)
$error 哪里报错, 如果有的话
$response_code 从服务器返回的响应代码
$headers 从服务器返回的头信息
$maxlength 最长返回数据长度
$read_timeout 读取操作超时 (requires PHP 4 Beta 4+)
设置为0为没有超时
$timed_out 如果一次读取操作超时了,本属性返回 true (requires PHP 4 Beta 4+)
$maxframes 允许追踪的框架最大数量
$status 抓取的http的状态
$temp_dir 网页服务器能够写入的临时文件目录 (/tmp)
$curl_path cURL binary 的目录, 如果没有cURL binary就设置为 false

以下是demo

1
2
3
4
5
6
7
8
9
10
11
12
13
14
15
16
17
18
19
20
21
22
23
24
25
26
27
include "Snoopy.class.php";   
$snoopy = new Snoopy;

$snoopy->proxy_host = "www.baidu.com";
$snoopy->proxy_port = "8080";

$snoopy->agent = "(compatible; MSIE 4.01; MSN 2.5; AOL 4.0; Windows 98)";
$snoopy->referer = "http://www.baidu.com/";

$snoopy->cookies["SessionID"] = 238472834723489l;
$snoopy->cookies["favoriteColor"] = "RED";

$snoopy->rawheaders["Pragma"] = "no-cache";

$snoopy->maxredirs = 2;
$snoopy->offsiteok = false;
$snoopy->expandlinks = false;

$snoopy->user = "joe";
$snoopy->pass = "bloe";

if($snoopy->fetchtext("http://www.baidu.com"))
{
echo "<PRE>".htmlspecialchars($snoopy->results)."</PRE>\n";<BR>
}else{
echo "error fetching document: ".$snoopy->error."\n";
}

snoopy采集phpchina示例

1
2
3
4
5
6
7
8
9
10
11
12
13
14
15
16
17
18
19
20
21
22
23
24
25
26
27
28
29
30
31
32
33
34
35
36
37
38
39
40
41
42
43
44
45
46
47
48
49
50
51
52
53
54
55
56
57
58
59
60
61
62
63
64
65
66
67
68
69
70
71
72
73
74
75
76
77
78
79
80
81
82
83
84
85
86
87
88
89
90
91
92
93
94
95
96
97
98
99
100
101
102
103
104
105
106
107
108
109
110
111
112
113
114
115
116
117
118
119
120
121
122
123
124
125
126
127
128
129
130
131
132
133
134
135
136
137
138
139
140
141
142
143
144
145
146
147
148
149
150
151
152
153
154
155
156
157
158
159
160
161
162
163
164
165
166
167
168
169
170
171
172
173
174
175
176
177
178
179
180
181
182
183
<?php  
//采集phpchina
set_time_limit(0);
require_once("Snoopy.class.php");
$snoopy=new Snoopy();
//登陆论坛
$submit_url = "http://www.phpchina.com/bbs/logging.php?action=login";
$submit_vars["loginmode"] = "normal";
$submit_vars["styleid"] = "1";
$submit_vars["cookietime"] = "315360000";
$submit_vars["loginfield"] = "username";
$submit_vars["username"] = "***"; //你的用户名
$submit_vars["password"] = "*****"; //你的密码
$submit_vars["questionid"] = "0";
$submit_vars["answer"] = "";
$submit_vars["loginsubmit"] = "提 交";
$snoopy->submit($submit_url,$submit_vars);
if ($snoopy->results)
{
//获取连接地址
$snoopy->fetchlinks("http://www.phpchina.com/bbs");
$url=array();
$url=$snoopy->results;

foreach ($url as $key=>$value)
{
//匹配http://www.phpchina.com/bbs/forumdisplay.php?fid=156&sid=VfcqTR地 址即论坛板块地址
if (!preg_match("/^(http:\/\/www\.phpchina\.com\/bbs\/forumdisplay\.php\?fid=)[0-9]*&sid=[a-zA-Z]{6}/i",$value)){
unset($url[$key]);
}
}
//获取到板块数组$url,循环访问,此处获取第一个模块第一页的数据
$i=0;
foreach ($url as $key=>$value)
{
if ($i>=1)
{
//测试限制
break;
}
else
{
//访问该模块,提取帖子的连接地址,正式访问里需要提取帖子分页的数据,然后根据分页数据提取帖子数据
$snoopy=new Snoopy();
$snoopy->fetchlinks($value);
$tie=array();
$tie[$i]=$snoopy->results;

//转换数组
foreach ($tie[$i] as $key=>$value)
{
//匹配http://www.phpchina.com/bbs/viewthread.php?tid=68127&amp; extra=page%3D1&amp;page=1&sid=iBLZfK

if
(!preg_match("/^(http:\/\/www\.phpchina\.com\/bbs\/viewthread\.php\?tid=)[0-9]*&amp;extra=page\%3D1&amp;page=[0-9]*&sid=[a-zA-Z]{6}/i",$value))
{
unset($tie[$i][$key]);
}
}
//归类数组,将同一个帖子不同页面的内容放一个数组里
$left='';//连接左边公用地址
$j=0;
$page=array();
foreach ($tie[$i] as $key=>$value)
{
$left=substr($value,0,52);
$m=0;
foreach ($tie[$i] as $pkey=>$pvalue)
{
//重组数组
if (substr($pvalue,0,52)==$left)
{
$page[$j][$m]=$pvalue;
$m++;
}
}
$j++;
}
//去除重复项开始
//$page=array_unique($page);只能用于一维数组
$paget[0]=$page[0];
$nums=count($page);
for ($n=1;$n<$nums;$n++)
{
$paget[$n]=array_diff($page[$n],$page[$n-1]);
}
//去除多维数组重复值结束
//去除数组空值
unset($page);
$page=array();//重新定义page数组
$page=array_filter($paget);

$u=0;
$title=array();
$content=array();
$temp='';
$tt=array();
foreach ($page as $key=>$value)
{
//外围循环,针对一个帖子
if (is_array($value))
{
foreach ($value as $k1=>$v1)
{
//页内循环,针对一个帖子的N页
$snoopy=new Snoopy();
$snoopy->fetch($v1);
$temp=$snoopy->results;
//读取标题
if (!preg_match_all("/<h2>(.*)<\/h2>/i",$temp,$tt))
{
echo "no title";
exit;
}
else
{
$title[$u]=$tt[1][1];
}
unset($tt);
//读取内容

if (!preg_match_all("/<div id=\"postmessage_[0-9]{1,8}\"
class=\"t_msgfont\">(.*)<\/div>/i",$temp,$tt))
{
print_r($tt);
echo "no content1";
exit;
}
else
{
foreach ($tt[1] as $c=>$c2)
{
$content[$u].=$c2;
}
}
}
}
else
{
//直接取页内容
$snoopy=new Snoopy();
$snoopy->fetch($value);
$temp=$snoopy->results;
//读取标题
if (!preg_match_all("/<h2>(.*)<\/h2>/i",$temp,$tt))
{
echo "no title";
exit;
}
else
{
$title[$u]=$tt[1][1];
}
unset($tt);
//读取内容

if (!preg_match_all("/<div id=\"postmessage_[0-9]*\"
class=\"t_msgfont\">(.*)<\/div>/i",$temp,$tt))
{
echo "no content2";
exit;
}
else
{
foreach ($tt[1] as $c=>$c2)
{
$content[$u].=$c2;
}
}
}
$u++;
}
print_r($content);
}
$i++;
}
}
else
{
echo "login failed";
exit;
}
?>

利用google生成二维码的开放接口

代码如下:

1
2
3
4
5
6
7
8
9
10
11
12
13
14
15
/**
* google api 二维码生成【QRcode可以存储最多4296个字母数字类型的任意文本,具体可以查看二维码数据格式】
* @param string $data 二维码包含的信息,可以是数字、字符、二进制信息、汉字。不能混合数据类型,数据必须经过UTF-8 URL-encoded.如果需要传递的信息超过2K个字节,请使用POST方式
* @param int $widhtHeight 生成二维码的尺寸设置
* @param string $EC_level 可选纠错级别,QR码支持四个等级纠错,用来恢复丢失的、读错的、模糊的、数据。
* L-默认:可以识别已损失的7%的数据
* M-可以识别已损失15%的数据
* Q-可以识别已损失25%的数据
* H-可以识别已损失30%的数据
* @param int $margin 生成的二维码离图片边框的距离
*/
function generateQRfromGoogle($data,$widhtHeight='150',$EC_level='L',$margin='0'){
$url=urlencode($data);
echo '<img src="http://chart.apis.google.com/chart?chs='.$widhtHeight.'x'.$widhtHeight.'&cht=qr&chld='.$EC_level.'|'.$margin.'&chl='.$data.'" widhtHeight="'.$widhtHeight.'" widhtHeight="'.$widhtHeight.'"/>';
}

使用方法:

1
2
$data='版权所有:http://www.gowhich.com/';
generateQRfromGoogle($data);

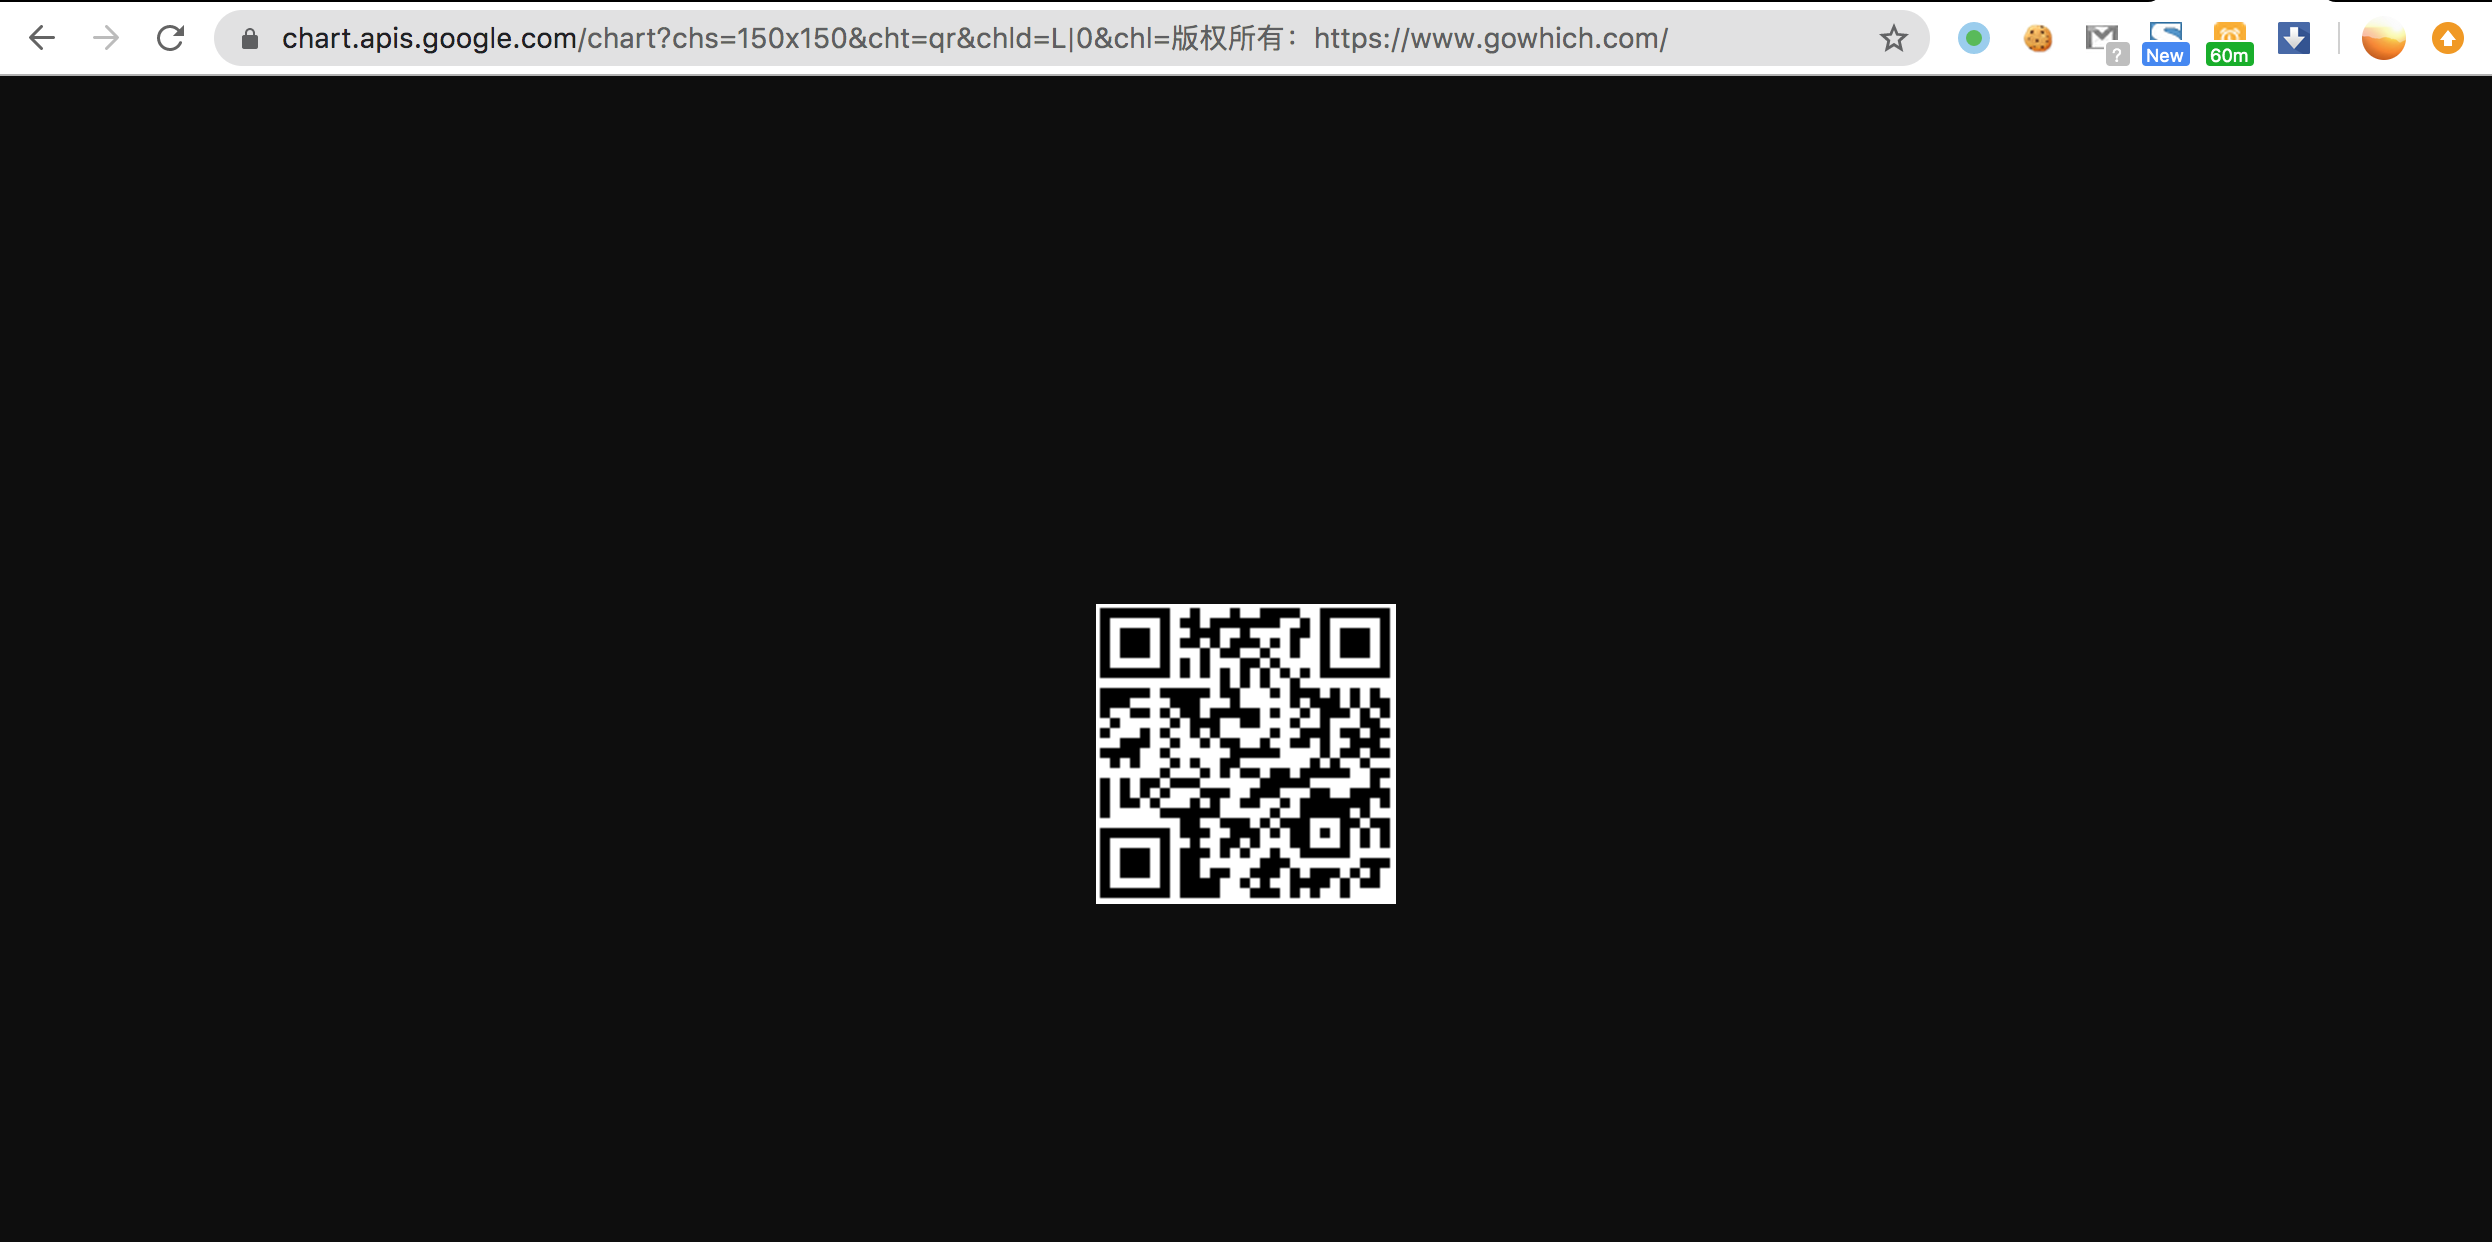
生成的二维码图片如下:

同时,post方法实现请求google api 生成二维码的方式如下:

1
2
3
4
5
6
7
8
9
10
11
12
13
14
15
16
17
18
19
20
21
function generateQRfromGoogle($width,$height,$string){
$postData=array();
$postData['cht']='qr';
$postData['chs']=$width."x".$height;
$postData['chl']=$string;
$postData['choe']="UTF-8";
$url="http://chart.apis.google.com/chart";
$dataArray=array();
foreach($postData as $key=>$value){
$dataArray[]=$key.'='.$value;
}
$data=implode("&",$dataArray);
$ch=curl_init();
curl_setopt($ch, CURLOPT_POST, 1);
curl_setopt($ch, CURLOPT_HEADER, 0);
curl_setopt($ch, CURLOPT_URL, $url);
curl_setopt($ch, CURLOPT_POSTFIELDS,$data);
curl_setopt($ch, CURLOPT_RETURNTRANSFER, 1);
$result=curl_exec($ch);
return $result;
}

调用的方法如下

1
2
3
4
5
header("Content-type:image/png");
$width=300;
$height=300;
$data='版权所有:https://www.gowhich.com/';
echo generateQRfromGoogle($width,$height,$data);

使用php QR Code类库生成二维码

注意使用该类库必须首先下载类库包,下载地址:

地址:http://phpqrcode.sourceforge.net/
下载:http://sourceforge.net/projects/phpqrcode/

下载下来的压缩包里面有很多示例,可以自行研究,下面给出一个简单的使用案例(具体参数的意思和上面大同小异):

1
2
3
4
5
6
<?php 
include "./phpqrcode.php";
$data='版权所有:http://www.gowhich.com/';
$errorCorrectionLevel="L";
$matrixPointSize="4";
QRcode::png($data,false,$errorCorrectionLevel,$matrixPointSize);

一般来说这种情况还是蛮多的,比如你从文件中读入了一个array1,然后想把程序中的一个array2中符合array1中内容的元素过滤出来。

正 常傻瓜一点就是两个for循环,一个一个进行比较,这样效率不高,而且代码也不好看。

其实一个循环或者无需循环就可以搞定了,那就需要用到NSPredicate这个类

1)例子一,循环过滤

我想过滤arrayContents的话只要循环 arrayFilter就好了

1
2
3
4
5
6
7
8
9
10
11
12
13
14
15
16
17
18
19
20
21
22
23
24
25
26
27
28
29
30
31
32
33
34
35
//  main.m
// test
//
// Created by david on 13-8-12.
// Copyright (c) 2013年 WalkerFree. All rights reserved.
//

#import <Foundation/Foundation.h>

int main(int argc, const char * argv[])
{

@autoreleasepool {

NSArray *arrayFilter = [NSArray arrayWithObjects:@"pict", @"blackrain", @"ip", nil];


NSArray *arrayContents = [NSArray arrayWithObjects:@"I am a picture.",
@"I am a guy", @"I am gagaga", @"ipad", @"iphone", nil];

int i = 0;
int count = (int)[arrayFilter count];

for(i = 0; i < count; i ++)
{

NSString *arrayItem = (NSString *)[arrayFilter objectAtIndex:i];

NSPredicate *filterPredicate = [NSPredicate predicateWithFormat:@"SELF CONTAINS %@", arrayItem];
NSLog(@"Filtered array with filter %@, %@", arrayItem, [arrayContents filteredArrayUsingPredicate:filterPredicate]);
}

}
return 0;
}

输出结果是:

1
2
3
4
5
6
7
8
9
2013-08-12 23:35:06.642 test[90135:303] Filtered array with filter pict, (
"I am a picture."
)
2013-08-12 23:35:06.644 test[90135:303] Filtered array with filter blackrain, (
)
2013-08-12 23:35:06.645 test[90135:303] Filtered array with filter ip, (
ipad,
iphone
)

当然以上代码中arrayContent最好用mutable 的,这样就可以直接filter了,NSArray是不可修改的。

2)例子二,无需循环

1
2
3
4
5
6
7
8
9
10
11
12
13
14
15
16
17
18
19
20
21
22
23
24
25
26
//
// main.m
// test
//
// Created by david on 13-8-12.
// Copyright (c) 2013年 WalkerFree. All rights reserved.
//

#import <Foundation/Foundation.h>

int main(int argc, const char * argv[])
{

@autoreleasepool {

NSArray *arrayFilter = [NSArray arrayWithObjects:@"abc1", @"abc3", nil];

NSArray *arrayContent = [NSArray arrayWithObjects:@"a1", @"abc1", @"abc4", @"abc2", nil];

NSPredicate *thePredicate = [NSPredicate predicateWithFormat:@"NOT (SELF in %@)", arrayFilter];

arrayContent = [arrayContent filteredArrayUsingPredicate:thePredicate];
NSLog(@"arrayContent = %@",arrayContent);
}
return 0;
}

输出结果是:

1
2
3
4
5
2013-08-12 23:34:36.653 test[90122:303] arrayContent = (
a1,
abc4,
abc2
)

这样arrayContent过滤出来的就是不包含 arrayFilter中的所有item了。

3)生成文件路径下文件集合列表

1
2
3
4
5
6
7
8
9
10
11
12
13
14
15
16
17
18
19
20
21
22
23
24
25
26
//
// main.m
// test
//
// Created by david on 13-8-12.
// Copyright (c) 2013年 WalkerFree. All rights reserved.
//

#import <Foundation/Foundation.h>

int main(int argc, const char * argv[])
{

@autoreleasepool {

NSFileManager *fileManager = [NSFileManager defaultManager];

NSString *defaultPath = [[NSBundle mainBundle] resourcePath];

NSError *error;

NSArray *directoryContents = [fileManager contentsOfDirectoryAtPath:defaultPath error:&error];
NSLog(@"directoryContents = %@",directoryContents);
}
return 0;
}

输出结果是:

1
2
3
2013-08-12 23:33:11.844 test[90093:303] directoryContents = (
test
)

4)match的用法

  1. 简单比较
1
2
3
4
5
6
7
8
9
10
11
12
13
14
15
16
17
18
19
20
21
22
23
24
25
26
27
28
29
30
//
// main.m
// test
//
// Created by david on 13-8-12.
// Copyright (c) 2013年 WalkerFree. All rights reserved.
//

#import <Foundation/Foundation.h>

int main(int argc, const char * argv[])
{

@autoreleasepool {

NSFileManager *fileManager = [NSFileManager defaultManager];

NSString *defaultPath = [[NSBundle mainBundle] resourcePath];

NSError *error;

NSArray *directoryContents = [fileManager contentsOfDirectoryAtPath:defaultPath error:&error];
NSLog(@"directoryContents = %@",directoryContents);
NSString *match = @"imagexyz-999.png";
NSPredicate *predicate = [NSPredicate predicateWithFormat:@"SELF == %@", match];
NSArray *results = [directoryContents filteredArrayUsingPredicate:predicate];
NSLog(@"results = %@",results);
}
return 0;
}

输出结果是:

1
2
3
4
5
2013-08-12 23:41:50.130 test[90258:303] directoryContents = (
test
)
2013-08-12 23:41:50.132 test[90258:303] results = (
)
  1. match里like的用法(类似Sql中的用法)
1
2
3
4
5
6
7
8
9
10
11
12
13
14
15
16
17
18
19
20
21
22
23
24
25
26
27
28
29
30
//
// main.m
// test
//
// Created by david on 13-8-12.
// Copyright (c) 2013年 WalkerFree. All rights reserved.
//

#import <Foundation/Foundation.h>

int main(int argc, const char * argv[])
{

@autoreleasepool {

NSFileManager *fileManager = [NSFileManager defaultManager];

NSString *defaultPath = [[NSBundle mainBundle] resourcePath];

NSError *error;

NSArray *directoryContents = [fileManager contentsOfDirectoryAtPath:defaultPath error:&error];
NSLog(@"directoryContents = %@",directoryContents);
NSString *match = @"imagexyz*.png";
NSPredicate *predicate = [NSPredicate predicateWithFormat:@"SELF like %@", match];
NSArray *results = [directoryContents filteredArrayUsingPredicate:predicate];
NSLog(@"results = %@",results);
}
return 0;
}

输出结果是:

1
2
3
4
5
2013-08-12 23:45:15.239 test[90312:303] directoryContents = (
test
)
2013-08-12 23:45:15.245 test[90312:303] results = (
)
  1. 大小写比较

[c]表示忽略大小写,[d]表示忽略重音,可以在一起使用,如下:

1
2
3
4
5
6
7
8
9
10
11
12
13
14
15
16
17
18
19
20
21
22
23
24
25
26
27
28
29
30
//
// main.m
// test
//
// Created by david on 13-8-12.
// Copyright (c) 2013年 WalkerFree. All rights reserved.
//

#import <Foundation/Foundation.h>

int main(int argc, const char * argv[])
{

@autoreleasepool {

NSFileManager *fileManager = [NSFileManager defaultManager];

NSString *defaultPath = [[NSBundle mainBundle] resourcePath];

NSError *error;

NSArray *directoryContents = [fileManager contentsOfDirectoryAtPath:defaultPath error:&error];
NSLog(@"directoryContents = %@",directoryContents);
NSString *match = @"imagexyz*.png";
NSPredicate *predicate = [NSPredicate predicateWithFormat:@"SELF like [cd] %@", match];
NSArray *results = [directoryContents filteredArrayUsingPredicate:predicate];
NSLog(@"results = %@",results);
}
return 0;
}

输出结果是:

1
2
3
4
5
2013-08-12 23:46:29.758 test[90336:303] directoryContents = (
test
)
2013-08-12 23:46:29.764 test[90336:303] results = (
)

4.使用正则

1
2
3
4
5
6
7
8
9
10
11
12
13
14
15
16
17
18
19
20
21
22
23
24
25
26
27
28
29
30
//
// main.m
// test
//
// Created by david on 13-8-12.
// Copyright (c) 2013年 WalkerFree. All rights reserved.
//

#import <Foundation/Foundation.h>

int main(int argc, const char * argv[])
{

@autoreleasepool {

NSFileManager *fileManager = [NSFileManager defaultManager];

NSString *defaultPath = [[NSBundle mainBundle] resourcePath];

NSError *error;

NSArray *directoryContents = [fileManager contentsOfDirectoryAtPath:defaultPath error:&error];
NSLog(@"directoryContents = %@",directoryContents);
NSString *match = @"imagexyz-\\d{3}\\.png";
NSPredicate *predicate = [NSPredicate predicateWithFormat:@"SELF matches %@", match];
NSArray *results = [directoryContents filteredArrayUsingPredicate:predicate];
NSLog(@"results = %@",results);
}
return 0;
}

输出结果是:

1
2
3
4
5
2013-08-12 23:47:30.005 test[90358:303] directoryContents = (
test
)
2013-08-12 23:47:30.015 test[90358:303] results = (
)

开篇之前,先来几个链接http://www.font-face.com/#google_announcement

对于前端,强大不是一般般般的。

先来看几个例子

1
2
3
4
5
6
7
8
9
10
11
12
13
14
<html>
<head>
<link rel="stylesheet" type="text/css" href="http://fonts.googleapis.com/css?family=Tangerine">
<style>
body {
font-family: 'Tangerine', serif;
font-size: 48px;
}
</style>
</head>
<body>
<div>Making the Web Beautiful!</div>
</body>
</html>

来看一下效果图

加点css的修改

1
2
3
4
5
body {
font-family: 'Tangerine', serif;
font-size: 48px;
text-shadow: 4px 4px 4px #aaa;
}

再来看看效果

是不是很赞啦。

这种操作,在我们的项目中,还是很必要的,尤其是前端,从美感上讲,我觉得可以跟苹果的ui媲美,没准苹果也是在用这个呢。

实现原理很简单额

1,第一步,引入css,是google字体的css

1
<link rel="stylesheet" type="text/css" href="http://fonts.googleapis.com/css?family=Font+Name">

2,第二步,在css中使用自己引入的字体,也可以在自己的html代码中调用的

1
2
3
4
CSS selector {
font-family: 'Font Name', serif;
}
<div style="font-family: 'Font Name', serif;">Your text</div>

如果字体不好看的话,还有很多的字体的,请看这里http://www.google.com/fonts

对于具体的字体的话,可以去这样调用的

1
http://fonts.googleapis.com/css?family=Tangerine:bold,bolditalic|Inconsolata:italic|Droid+Sans

很好解释的

Tangerine:bold,bolditalic

Tangerine想要的字体的名字,bold,bolditalic想要得到的字体的样式,如果想要多个话,就是用|进行分割,迫不及待了,试验一下。

jquery validate 实例 remote操作 自定义错误提示

关于这个网站上好多的示例,但是为看到过有关于remote的操作,还有关于自定义错误提示的示例,自己google一下,自己又测试了一下来个PHP版本的,此项目方案更适合于QEEPHP框架,或者其他的框架。

html代码

1
2
3
4
5
6
7
8
9
10
11
12
13
14
15
16
17
18
19
<form id='complete-form' action="" method="post">
<li class="input">
<span class="title">邮箱</span>
<input id='email' name='email' type="email" />
<span class="back"></span>
</li>
<li class="input">
<span class="title">登录密码</span>
<input id='password' name='password' type="password" />
<span class="back"></span></li>
<li class="input">
<span class="title">确认密码</span>
<input id='repassword' name='repassword' type="password" />
<span class="back"></span>
</li>
<li class="submit">
<span>完成注册</span>
</li>
</form>

js代码

1
2
3
4
5
6
7
8
9
10
11
12
13
14
15
16
17
18
19
20
21
22
23
24
25
26
27
28
29
30
31
32
33
34
35
36
37
38
39
40
41
42
43
44
45
46
47
48
49
50
<script language="javascript">
$(function(){
$('form#complete-form').validate({
rules: {
email:{
required:true,
email:true,
remote:{
url:'/default/isemail/type/validate',
type:'post'
},
},
password:{
required:true,
minlength:6,
},
repassword:{
required:true,
equalTo:password,
minlength:6,
}
},
messages:{
email:{
required:'邮箱地址不能为空',
email:'邮箱格式错误',
remote:'该邮箱已经被注册 <a href="/default/bind">绑定账号</a>'
},
password:{
required:'登录密码不能为空',
minlength:'密码长度不能少于6个字符'
},
repassword:{
required:'确认密码不能为空',
minlength:'密码长度不能少于6个字符',
equalTo:'确认密码与输入的密码不一致'
}
},
errorElement:'em',
errorPlacement: function(error, element) {
error.appendTo( element.parent().find('.back'));

},
});

$("#complete .submit span").click(function(){
$("#complete form").submit();
})
});
</script>

php后台操作代码:

1
2
3
4
5
6
7
8
9
10
11
12
13
14
15
16
17
18
19
20
21
22
23
24
25
26
27
28
29
30
31
32
/**
* Email是否存在
*/
public function actionIsEmail(){
$email = $this->_context->post('email','');
$ajaxType = $this->_context->get('type','');

$email = $this->filter($email);
$obj = User_Star::find('email=?',$email)->query();

if(empty($obj->id)){
if($ajaxType != 'validate'){
$message['error'] = 1;//可以注册
$message['email'] = false;
echo json_encode($message);
exit;
}else{
echo 'true';
exit;
}
}else{
if($ajaxType != 'validate'){
$message['error'] = 0;//不可以注册
$message['email'] = true;
echo json_encode($message);
exit;
}else{
echo 'false';
exit;
}
}
}

这里提示几点,

1,记载jquery框架库

2,加载jauery.validate插件

3,php后台输出操作,一定是字符串型的

记录这篇文章的前提是,uwsgi的环境,nginx的环境和django框架都已经搭建完毕了。不会的自己可以去google

1,项目创建

1
sudo django-admin.py startproject walkerfree

2,配置nginx server

1
2
3
4
5
6
7
8
9
10
11
12
13
14
15
16
17
18
19
20
21
22
23
24
25
26
27
server
{
listen 80;
server_name www.walkerfree.com;
index index.html index.htm default.html default.htm;
root /home/wwwroot/walkerfree/walkerfree;

access_log /home/wwwlogs/www.walkerfree.access.log;
error_log /home/wwwlogs/www.walkerfree.error.log;

location / {
include uwsgi_params;
uwsgi_pass unix://tmp/walkerfree.socket;
}

location ^~ /static/ {
root /home/wwwroot/walkerfree/;
}

location ~ ^.+\.(gif|jpg|png|ico|jpeg)$ {
expires 3d;
}

location ~ ^.+\.(css|js)$ {
expires 12h;
}
}

3,配置项目的uwsgi启动设置

1
2
3
4
5
6
7
8
9
10
[uwsgi]
socket = /tmp/walkerfree.socket
#http=127.0.0.1:9090
chdir=/home/wwwroot/walkerfree
module=walkerfree.wsgi
master=True
pidfile=/tmp/uwsgi.pid
vacuum=True
max-requests=5000
daemonize=/home/wwwlogs/walkerfree-uwsgi.log

4,启动uwsgi,启动nginx(root角色)

1
2
nginx -s reload
uwsgi --ini /usr/local/etc/uwsgi/walkerfree-uwsgi.ini

5,启动成功

0%